A Studio of One's Own
Posted on February 8, 2021 by Andreea Gabor
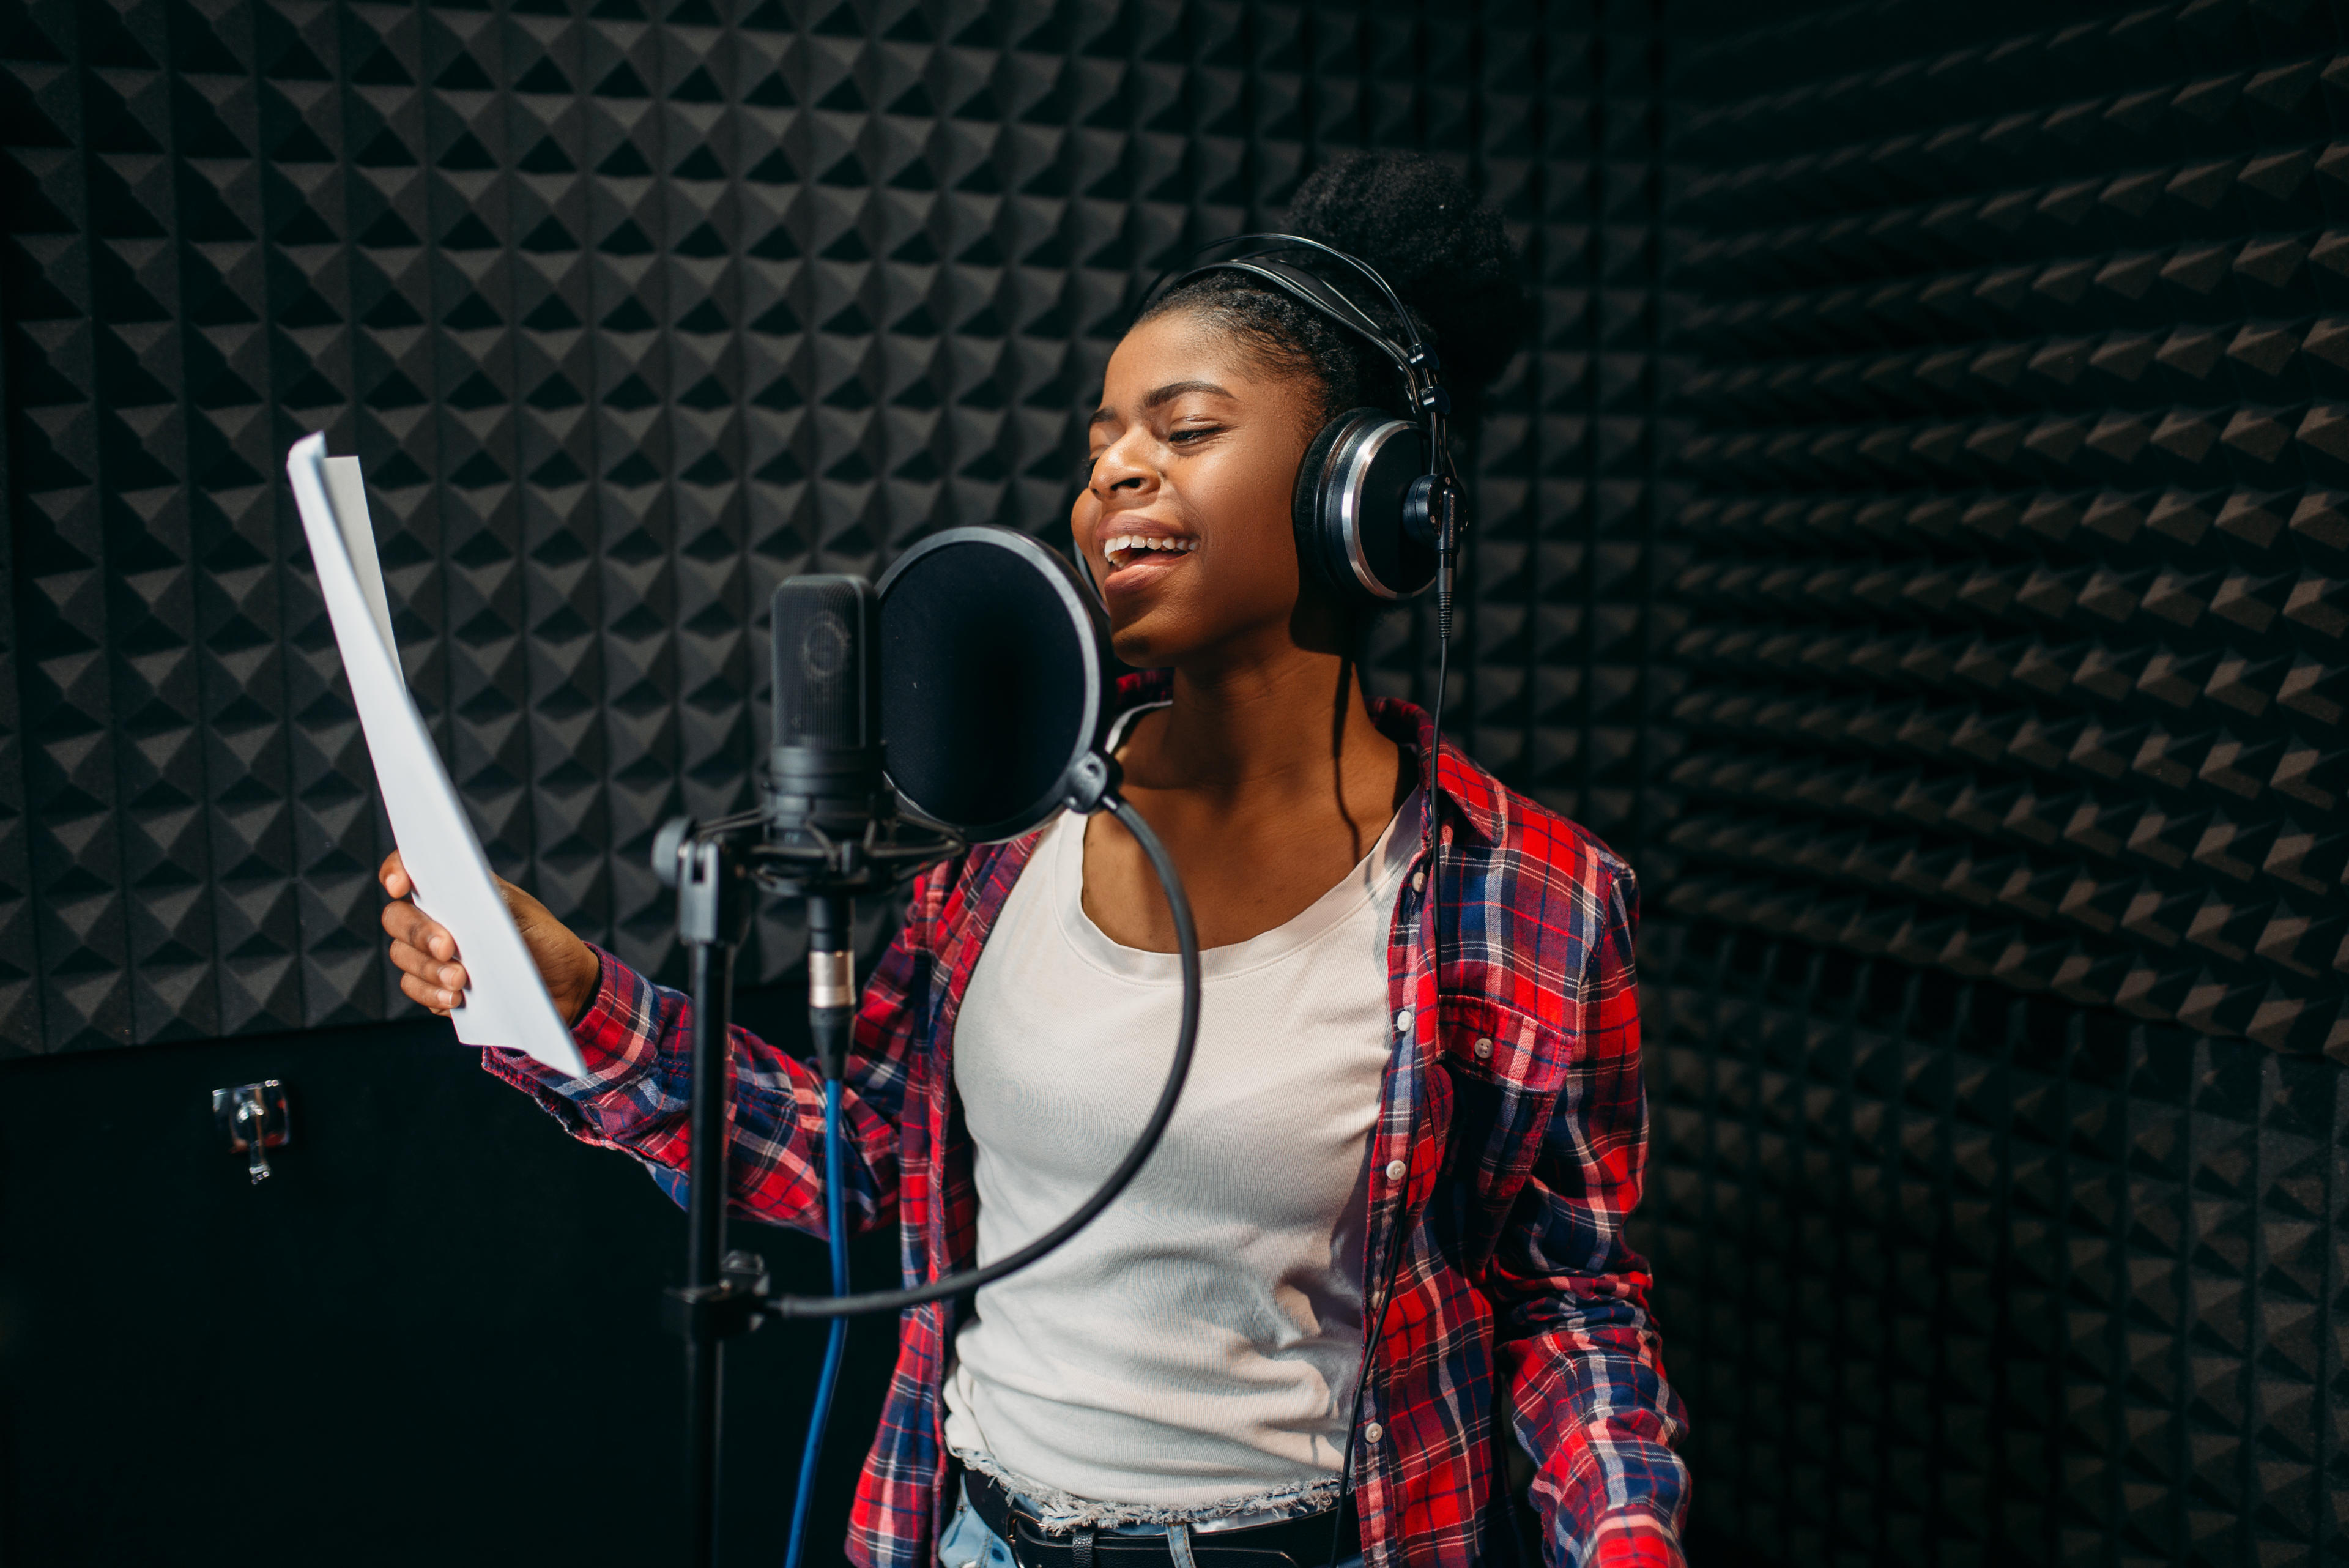
Every audiobook Producer needs a space that they can call their own—a space where they can harness the hypnotic power of their voice and keep the outside world, well, outside. In the first post of this three-part series, we’ll show you how to set up your recording studio and walk you through the essentials, from layout and soundproofing to selecting the right gear.
It’s all about location
You have to customize your studio to best fit your space, whether that’s a tiny house in the mountains, a crowded high rise in Manhattan, a condo by the beach, or a house with high ceilings in the suburbs. Some of the best home recording studios are built in a closet, with a designated desk for post-production in another room. Other producers soundproof their office, living room, or even bedroom. When choosing your studio space, consider: Are there any windows? More windows means more unexpected noise, especially if they face the street. Thick curtains can help block out many noises (but not construction sounds like jackhammers). Do you want to record standing up or sitting down? Both ways work; it’s just a matter of how you’re most comfortable performing. Each will require a different amount of space and type of microphone stand. How much space will there be between you, the microphone, and the walls? A microphone is best set up at a point no further than 40% away from the front wall, half-way between the side walls, and 60% away from the back wall. What kind of floor do you have: carpeted, tile, or hardwood? Carpet is ideal for sound insulation, and you can always buy a thick rug or isolation pad (more on that later). How high are the ceilings? You’ll have to add soundproofing to the ceiling, too, so you want to be able to reach it. Another important factor to consider is whether or not there’s an open power outlet near your designated space. To minimize any faint electric buzzing noises, you’ll want to plug all your gear into one surge protector, in one outlet.
The sound of silence
So you’ve picked the quietest room in your house, away from street-facing windows, noisy refrigerators, and your overly enthusiastic children. Bear with us—this space is not as quiet as you think. Close your eyes and listen. Then listen closer. You might start hearing your AC unit on the other side of your house. A plane flying overhead. Your upstairs neighbors stomping around. Without proper soundproofing, all of these sounds and more will be readily picked up by your sensitive voice-recording microphone and jolt listeners out of their immersive audiobook experience. Don’t worry, our tips below will help ensure that your audio meets our Submission Requirements before it ever reaches your audience’s eager ears.
DIY soundproofing and acoustic treatment
Walls and Ceiling: Block out external noise and dampen vibrations by covering your walls and ceiling with acoustic panels, egg-crate mattress covers, carpets, or even thick moving blankets, duvet covers, or curtains. If you’re using fabric insulation, leave a bit of space between each panel so the sound of your voice can be diffused a little and won’t sound flat (sometimes fabric absorbs sounds almost too well).
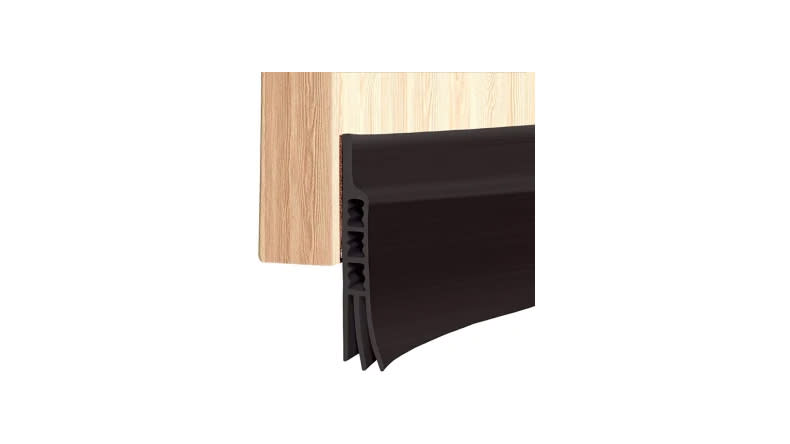
Door: Treat the studio side of your door the same way as your walls and ceiling. You want to make sure that all cracks are covered, and you also want to be able to get in and out easily. We recommend using a plastic door sweep or a long, dense pillow to cover the crack between the door and the floor when you’re recording.
Floor: If your studio space is not already carpeted, buy a thick rug to cover your entire floor. In addition to blocking out noise and eliminating vibrations, recording on carpet will help mask low end frequencies emitted by your equipment. If carpet isn’t doing the trick, or you have some wiggle room in your budget, you can opt for isolation pads to cover your floor.
Furniture: Fully stocked bookcases placed in corners of your studio can help with acoustic treatment because they diffuse sound waves. Additionally, if you want to record sitting down, you should look for a desk that’s stable and large enough to hold your microphone, computer, and accessories; your chair should be the right height for your desk, comfortable, and not squeak (even if you’re narrating a horror audiobook).
For more inspiration on your studio set-up, take a virtual visit to the DIY recording studios of three Audible Approved Producers.
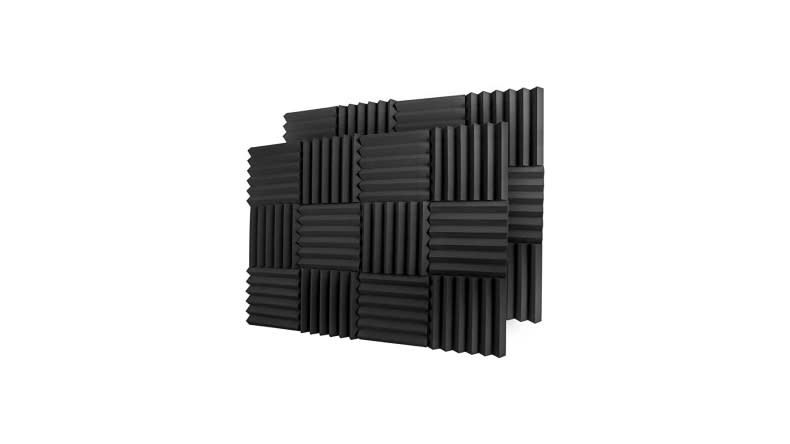
Acoustic Foam Panels


Find these product recommendations on our Studio Soundproofing Amazon Idea List.
Reducing noise with the right electronics
Microphone isolation shield: In addition to the soundproofing steps we’ve mentioned above, you may want to mount an isolation shield to your microphone to absorb any additional vibrations from your walls and floor. Be sure to follow the instructions when attaching the filter to your microphone, as mounting it too close to the microphone won’t do much in terms of sound absorption.
Computer: Another source of noise is your computer, specifically its fan and hard disk. We recommend using a low-power computer with an SSD drive and no fans, like the Microsoft Surface Pro, or very quiet fans like the Macbook Air. Another bonus for upgrading your computer is faster audio processing and editing. Note: check that your computer ports are compatible with your audio interface.
Lighting: You can make your space as bright or as dim as you want, but stay clear from fluorescent light bulbs, which can produce radio interference. Wall dimmers can also make a low buzzing noise when turned on. Instead, we recommend a desktop or standing lamp with LED bulbs which are quiet, energy efficient, and won’t add extra heat to your space.
Find these product recommendations on our Studio Accessories Amazon Idea List.
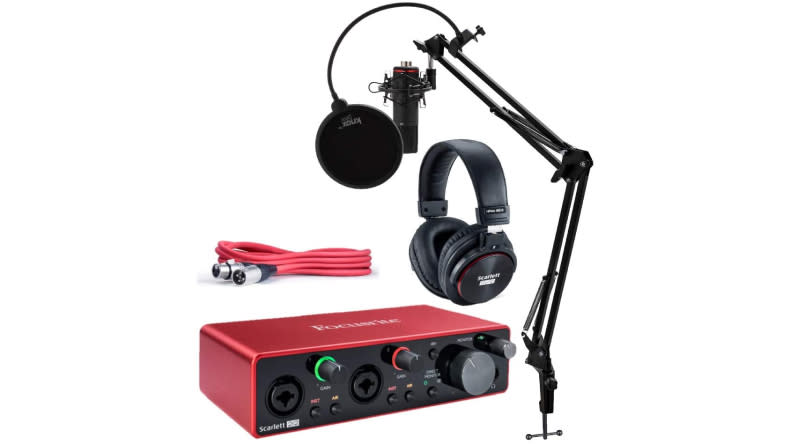
Choosing your recording studio gear
Just like your acoustic treatment has to be customized to fit your space, your studio gear should be tailored to your unique voice and environment. We won’t go into all of those factors here (check out Gearing Up For Audiobook Production Part 1 for more information), but we’ll introduce you to everything you need to get started. To record an audiobook, you’ll need a way to capture your voice (a microphone), a way to transfer and save your sound (typically an audio interface connected to your computer), a way to listen to your recording (headphones best replicate the audiobook listening experience), and a way to record and edit your sound files (software called a digital audio workstation or DAW).
Starter packs
We’ve selected the starter packs below for their ease of use and professional-grade quality. They include a studio condenser microphone, which is the most popular type of microphone used in audiobook recording; an audio interface; headphones; necessary cables; a DAW; and a selection of accessories like microphone stands and a pop filter to screen out popping noises during recording.
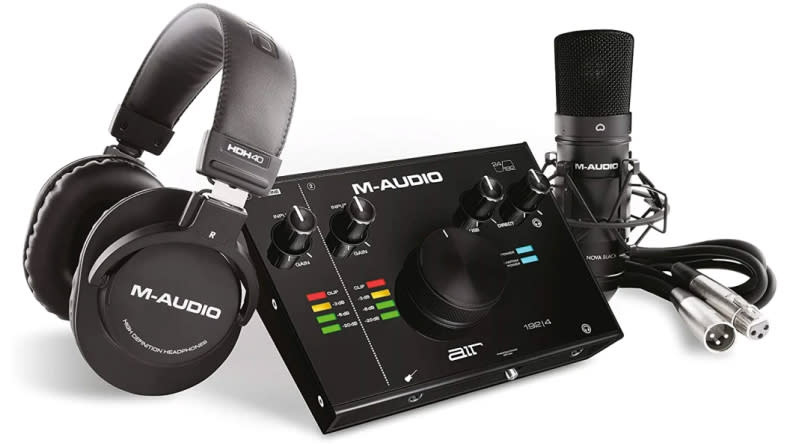
M-Audio Recording Bundle

Find these product recommendations on our Audiobook Recording Starter Packs Amazon Idea List.
Make yourself at home
Soundproofing your studio and using quality equipment will get you off to a solid start in producing amazing audiobooks. The most critical element is you: your voice, how you use it, and your ability to capture and master it to produce stories that will engage your listeners. So make yourself at home, get comfortable using your new equipment, and check out our Performance: The Craft of Narration video playlist to hone your voiceover skills.For more information, check out these Production Pointers from Audible Approved Producers and keep honing your craft.
