If you’re a regular reader of the ACX blog, you know we’ve been working our way through the list of items you’ll need for a professional sounding home recording studio. But what about the setup of the studio itself? Over the next few posts, we’ll be joined by expert and prolific producers from Audible Studios and ACX, who’ll offer their tips for the essential elements of home studio construction.
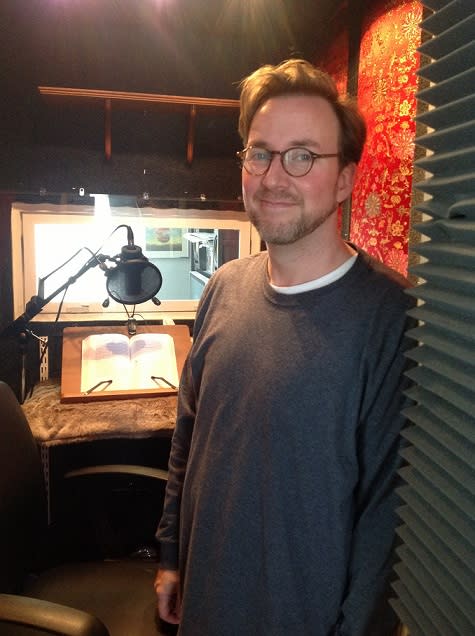
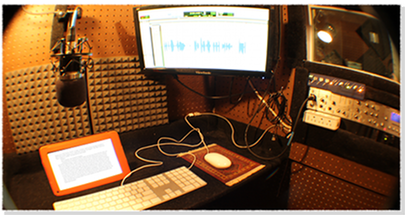
Today, we talk to ACX engineers, an author who built a home studio to narrate his own books, and our own Audible Studios staff about the importance of using high quality equipment and working with the noisy quirks of your unique recording space.
ACX: In your opinion, what are the most important elements of home studio construction?
Peter A. Rohan, ACX Producer: You’ve got to start with the right equipment. Use a “quiet” mic that gives you the best frequency results for your voice. Choose an interface with a good preamp that provides quality analog to digital (a/d) and digital to analog (d/a) conversion and that will not introduce a lot of noise. A budget mic and inferior interface can introduce an amount of noise and contribute to your overall noise floor. I found that out the hard way, after exhausting all my energies in soundproofing and absorption only to find that it was the cheap mic that I was using that was generating most of my noise floor.
Darren Vermaas, Audible Studios Post-Production Associate: Definately don’t skimp on the equipment. Using proper gear in the first steps of recording is going to make your life a lot easier in the end. Besides saving you time in post-production editing out noises and trying to figure out how to bring your overall noise floor down, it will simply make your book sound more professional.
Rob Granniss, Brick Shop Audiobooks: Get as good a mic, headphones, preamp and DAW as you can. Then get to know them as well as you can. Compare them with every other reference possible, including your laptop speakers, your cellphone, your audio geek friend’s sound system, etc. Listen to the same source material on each and note differences. Listen to your own recordings on those sources, as well as professionally produced recordings (voice as well as music if you’d like). The comparison isn’t to find what you like or what is “true” but rather to find what’s missing or is too enhanced about your own setup.
Peter: Also, be wary of cooling fans and keep them away from your mic. Avoid recording with your laptop near the microphone or anything else with a cooling fan that turns on and off as the temperature fluctuates.
Darren: Get away from noises. That ticking clock, running refrigerator, dogs barking outside your window at the loud trucks driving by, and (of course) that fan running in your computer are all potential hazards. These are all real things I’ve heard come through in recordings here. The last example is one of the most important to consider.
You will discover a lot of things about your room while you’re setting up a home studio. Noises you’ve never paid mind to are going to start jumping out, and you’ll have to figure out how to deal with them. When I needed to record vocals in my noisy 5 story apartment building with window AC units, you could find me hanging packing blankets and winter coats in my closet, positioning a microphone in there, and sweating it out while recording to make sure it sounded good. Not glamorous, and not comfortable, but it did sound good!
Stephen Woodfin, ACX Author/Narrator:
Without a doubt the single best thing I did was to read and study the information on ACX about what is involved in the process of setting up a home studio. I found that information practical and concise and used it as a blueprint each step along the way. I supplemented the ACX material by watching YouTube videos about the construction of home studios. In addition to watching videos, I read blogs and bought several books that provided more in depth discussions of audio production and equipment. From these books I was able to determine which equipment was essential for my purposes and which optional. I also learned that it wasn’t necessary to buy the most expensive equipment available because there are economical ways to build a studio capable of producing first-rate audio without skimping.
Check back with us next week for more for more expert discussion on home studio setup!
What do you think is the most important aspect of building a home studio?
If you come across some mention of or reference to the WhisperRoom (booth), ask around and check out some gab sites for questions and answers on this rig. It works well for some, but for others it’s not worth the $. A closet (w/a real door!) or a middle or basement room well insulated may serve you better.
Here’s one forum:
http://forum.saxontheweb.net/showthread.php?196639-Anybody-own-a-whisper-room
I hate the whisper room (which is no room but a fuzzy closet). Does not shield the noise I bought it for.
I agree with the above,I set up my studio about two years and “stretched” for a mic, phones, preamp, desk boom and baffles for my space. Total investment about $1700 plus elbow grease gluing the baffles on walls and ceiling. I’m still not happy with baffling, store told me spacing the tiles was OK and that a window was not a problem? I’m in a very rural country setting with minimum outside noise. Does anyone have a comment on spacing the baffle tiles, mine are about 6″apart with large panels on back of door and one outside wall.
I use Audiomute Soundproofing Sheets (blanket pads actually) as sound insulation in my basement studio. They hang on the walls and can be taken down quite easily. They’re great for keeping noise from interior plumbing or extraneous from outside. They’re inexpensive as well.
Check them out at http://www.audimutesoundproofing.com/audimute-sound-absorption-sheets-materials-that-absorb-sound-soundproofing-blankets.aspx
I would love to set up in our unfinished “way back” basement area under what used to be the garage of a 1935 house (talk about thick floors). The only noise is the furnace (controllable). It’s psychologically daunting to be down there, however, and one has to stoop to avoid the nails from the sub flooring above. Some day, however, we may move down there, set up some ceramic heat panels and be as cozy as hump-backed crickets. Don’t know how our demo clients would feel about it, tho.
Thank you for tip on Audiomute, will check them out. My space is small so will have to determine if their size ranges will work of if they can be customized?
You really don’t need a whisper room, an ISO booth, nor foam or other junk on your walls. All you need to do is ” draw in ” a little downward expansion in your dynamics processing GUI. Set it just right. No need to edit out breaths, while tightening everything up and reducing background noise and other acoustic aberrations. And follow your compression/limiting with that. Not before that. You’ll save plenty of $ & frustration. I know from whence I speak having cut thousands upon thousands of national commercials. And the worst commercial I ever heard, was Brenda Vaccaro for Playtex tampons, LMAO. Circa 1983. And it only got worse when they cut out her gasping breaths, weeks later. Downward expansion can fix such horrors. But that she kept on making that face every time she gasped for air. It’s indelibly imprinted in my mind. You remember things like that, when they’re that bad. Don’t let this happen to you! Downward expansion is how you expand your horizons. Really, truly, I’m not kidding! I’ve been doing it since the early 1970s with an API or Neve preamp & 1176 followed by a KEPEX-1 by Allison Research. Don’t forget the high pass filter and a little presence and high-end EQ, before or after all that folderol. To taste. Then you’ll be cooking with gas! Yeah baby!
To use a cooking analogy, I rather bake a loaf right than try to raise it up later, (in our case electronically). I respect your track record, but you can’t assume a new person starting out is NOT going to record in a bouncy walled space or be the victim of a helicopter or leaf blower outside. It’s just too simplistic to say you don’t or won’t need some of the afore-mentioned sound dampeners, etc.
I use the ACX mastering parameters for ACX/Audible books because they require it (it also works, by the way). But if I adjust the mic right, set the input right, make sure the area is quiet, grab some room tone I otherwise won’t need any post-recording “seasoning.”
And Brenda Vaccaro was always husky in the voice. Once reason I found her sexy.
Pingback: Upgrading Gear for Voicework « Seshat
Pingback: Upgrading Gear for Voicework | ShariWhitman.com
I do not have any affiliation with these people whatsoever, and have never met this guy.
I do use the product, very happily so…and thought someone might find this enlightening and helpful.
Reblogged this on onthewaytowealthy and commented:
This is a great Blog for all you self-publishers like myself 🙂
Here’s to helping many while creating passive income … Yipppppeeee 🙂
Pingback: Taking the Audiobook Plunge? Read This First - WRITERS HELPING WRITERS®
Pingback: 10 Reasons Why Your Book Should Be An Audiobook
Pingback: Converting A Novel Into An Audiobook - Diane Rinella, Author
Pingback: Newcomers Guide for ACX Narrators | The Voices In My Head
Hi. I know that this is a VERY old post. However, ACX is still using it as the link to answer their FAQ question:
What equipment would I need to get started as a Producer?
This normally wouldn’t be a problem, except that all the equipment in the links in your blog posts linked from here are no longer being sold because it’s not 2013 anymore.
It would be a huge help to me, and to anyone else who wants to start out, if you could reblog these posts with updated equipment and let the ACX webmaster know to change the link.
Thanks so much.
I’m researching that very thing myself right now. It is amazing that they linked to this thread. At any rate today’s tools are much better and cheaper than they were in 2013.